
Raid: Shadow Legends Doom Tower
The Doom Tower screen of the game: 120 floors with a boss on every tenth and the Secret Rooms on the side, in Normal and Hard. Every floor is here — its enemies (champions of the game, on boss floors the boss with stats and skills), what a battle costs in Silver or Gold Keys, the first clear rewards and what drops. Pick the rotation and the mode, then a floor on the tower.
Opens at level 40
 1
2
3
4
5
6
7
8
9
 11
12
13
14
15
16
17
18
19
 21
22
23
24
25
26
27
28
29
 31
32
33
34
35
36
37
38
39
 41
42
43
44
45
46
47
48
49
51
52
53
54
55
56
57
58
59
61
62
63
64
65
66
67
68
69
71
72
73
74
75
76
77
78
79
81
82
83
84
85
86
87
88
89
91
92
93
94
95
96
97
98
99
101
102
103
104
105
106
107
108
109
111
112
113
114
115
116
117
118
119
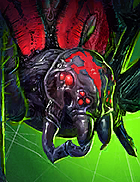
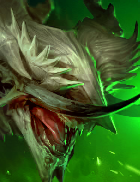
Floor 90 · Nether Spider
- Silver Keys
- 1

What one battle costs.
Wave 1


Wave 2
Agreth
Nether Spider
 Spirit · Lvl. 150
- HP
- 4,638,600
- ATK
- 2,474
- DEF
- 2,474
- SPD
- 150
- C.RATE
- 15%
- C.DMG
- 50%
- RES
- 100
- ACC
- 100
Boss skills
-

Envenomed Strands
Attacks all enemies. Places a 5% Poison debuff on all enemies for 4 turns.
Will repeat the attack 1 time for each Spiderling without any active buffs. The Poison debuffs cannot be resisted or blocked.
-

Brood Feast Cooldown: 3 turns
Spawns 4 Spiderlings, then places a Counterattack buff on all Spiderlings for 3 turns.
Will team up with all Spiderlings to attack all enemies if a Spiderling is spawned by this skill.
Agreth will attack with this Skill at the beginning of the round.
[Agreth can have a maximum of 4 Spiderlings in battle at any time.]
-

Elder Lurker [P]
Counterattacks whenever an enemy decreases Agreth’s Turn Meter.
The damage inflicted is equal to the amount of Turn Meter lost. Will ignore 100% of DEF.
-
Tide of Toxins [P]
Attacks all enemies at the start of each turn. Deals damage from all Poison debuffs on each enemy instantly.
When attacked by an enemy under a Poison debuff, increases the duration of all debuffs on the attacker by 1 turn, then places a 25% Poison Sensitivity debuff on them for 3 turns.
When attacked by an enemy that has no Poison debuff, places a 5% Poison debuff on the attacker for 4 turns. This debuff cannot be blocked or resisted.
-

Almighty Immunity [P]
Immune to Stun, Freeze, Sleep, Provoke, Block Active Skills, Block Passive Skills, Fear, True Fear, Petrification, Berserk, Enfeeble, Nullify, Ensnare, Fatigue, and Hunter's Gaze debuffs. Also immune to HP exchange effects, HP balancing effects, and cooldown increasing effects.
-

Almighty Strength [P]
Damage from skills that scale based on enemy MAX HP cannot exceed 10% of the Boss' MAX HP when attacking the Boss.
-

Almighty Persistence [P]
All Turn Meter reduction effects are decreased by 50% when used against the Boss.
Rewards
May drop in a battle
-
 Nether Eggs
× 5–9
50%
-
 Nether Eggs
× 7–13
50%
First clear
-
Nether Eggs
× 20
-
Nether Eggs
× 15
-
 Rank 4 Chicken
× 2
Strategy
How It Works
-
Agreth is an interesting challenge, as she thoroughly punishes AoE teams. Spiderling counterattacks will heal Agreth far faster than most teams can hurt her, not to mention the Poison they can stack up on your team. There is also a risk to bringing Champions that reduce Turn Meters, but with enough protection and healing, the risk is worth it.
-
It’s crucial to make sure that Spiderlings never counterattack or get a turn, so bringing Champions with AOE Stuns or Freezes will help you to defeat the Boss.
-
Last but not least, you will need to remove Poison from your team. These debuffs can’t be blocked or resisted, so the only way to deal with them is to remove them, and quickly - the Nether Spider will spit them back as direct damage every time she gets a turn, so waiting them out isn’t an option. However, they only deal damage, so powerful healing can counteract the effects if you can’t remove debuffs fast enough.
1
2
3
4
5
6
7
8
9
11
12
13
14
15
16
17
18
19
21
22
23
24
25
26
27
28
29
31
32
33
34
35
36
37
38
39
41
42
43
44
45
46
47
48
49
51
52
53
54
55
56
57
58
59
61
62
63
64
65
66
67
68
69
71
72
73
74
75
76
77
78
79
81
82
83
84
85
86
87
88
89
91
92
93
94
95
96
97
98
99
101
102
103
104
105
106
107
108
109
111
112
113
114
115
116
117
118
119
Floor 90 · Nether Spider
- Silver Keys
- 1
What one battle costs.
Wave 1
Wave 2
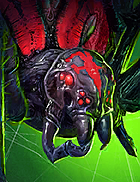
Agreth
Nether Spider
Spirit · Lvl. 290
- HP
- 9,803,151
- ATK
- 8,714
- DEF
- 8,714
- SPD
- 215
- C.RATE
- 15%
- C.DMG
- 50%
- RES
- 330
- ACC
- 250
Boss skills
-
Envenomed Strands
Attacks all enemies. Places a 5% Poison debuff on all enemies for 4 turns.
Will repeat the attack 1 time for each Spiderling without any active buffs. The Poison debuffs cannot be resisted or blocked.
-
Brood Feast Cooldown: 3 turns
Spawns 4 Spiderlings, then places a Counterattack buff on all Spiderlings for 3 turns.
Will team up with all Spiderlings to attack all enemies if a Spiderling is spawned by this skill.
Agreth will attack with this Skill at the beginning of the round.
[Agreth can have a maximum of 4 Spiderlings in battle at any time.]
-
Elder Lurker [P]
Counterattacks whenever an enemy decreases Agreth’s Turn Meter.
The damage inflicted is equal to the amount of Turn Meter lost. Will ignore 100% of DEF.
-
Tide of Toxins [P]
Attacks all enemies at the start of each turn. Deals damage from all Poison debuffs on each enemy instantly.
When attacked by an enemy under a Poison debuff, increases the duration of all debuffs on the attacker by 1 turn, then places a 25% Poison Sensitivity debuff on them for 3 turns.
When attacked by an enemy that has no Poison debuff, places a 5% Poison debuff on the attacker for 4 turns. This debuff cannot be blocked or resisted.
-
Almighty Immunity [P]
Immune to Stun, Freeze, Sleep, Provoke, Block Active Skills, Block Passive Skills, Fear, True Fear, Petrification, Berserk, Enfeeble, Nullify, Ensnare, Fatigue, and Hunter's Gaze debuffs. Also immune to HP exchange effects, HP balancing effects, and cooldown increasing effects.
-
Almighty Strength [P]
Damage from skills that scale based on enemy MAX HP cannot exceed 10% of the Boss' MAX HP when attacking the Boss.
-
Almighty Persistence [P]
All Turn Meter reduction effects are decreased by 50% when used against the Boss.
Rewards
May drop in a battle
-
Nether Eggs
× 5–10
50%
-
 Nether Eggs
× 3–5
50%
First clear
-
Nether Eggs
× 100
-
Nether Eggs
× 30
-
Rank 5 Chicken
Strategy
How It Works
-
Agreth is an interesting challenge, as she thoroughly punishes AoE teams. Spiderling counterattacks will heal Agreth far faster than most teams can hurt her, not to mention the Poison they can stack up on your team. There is also a risk to bringing Champions that reduce Turn Meters, but with enough protection and healing, the risk is worth it.
-
It’s crucial to make sure that Spiderlings never counterattack or get a turn, so bringing Champions with AOE Stuns or Freezes will help you to defeat the Boss.
-
Last but not least, you will need to remove Poison from your team. These debuffs can’t be blocked or resisted, so the only way to deal with them is to remove them, and quickly - the Nether Spider will spit them back as direct damage every time she gets a turn, so waiting them out isn’t an option. However, they only deal damage, so powerful healing can counteract the effects if you can’t remove debuffs fast enough.
Opens at level 40
 1
2
3
4
5
6
7
8
9
 11
12
13
14
15
16
17
18
19
 21
22
23
24
25
26
27
28
29
 31
32
33
34
35
36
37
38
39
 41
42
43
44
45
46
47
48
49
51
52
53
54
55
56
57
58
59
61
62
63
64
65
66
67
68
69
71
72
73
74
75
76
77
78
79
81
82
83
84
85
86
87
88
89
91
92
93
94
95
96
97
98
99
101
102
103
104
105
106
107
108
109
111
112
113
114
115
116
117
118
119
Floor 90 · Celestial Griffin
- Silver Keys
- 1
What one battle costs.
Wave 1
-
 Lydia the Deathsiren
Lvl. 120
-
 Pyxniel
Lvl. 120
-
 Belanor
Lvl. 120
-
Belanor
Lvl. 120
-
Lydia the Deathsiren
Lvl. 120
Wave 2

Grythion
Celestial Griffin
Spirit · Lvl. 280
- HP
- 1,493,325
- ATK
- 4,380
- DEF
- 3,982
- SPD
- 190
- C.RATE
- 15%
- C.DMG
- 50%
- RES
- 100
- ACC
- 100
Boss skills
-

Shockwave
Attacks 1 enemy. Has a 100% chance of placing a Fear debuff for 1 turn.
-

Rock Smash Cooldown: 3 turns
Transfers all debuffs from Grythion to each enemy, then attacks all enemies. Fills Grythion’s Turn Meter by 5% for each debuff transferred.
-

Death Gust Cooldown: 3 turns
Removes all buffs from all enemies, then attacks all enemies.
The buff removal cannot be resisted. Damage increases by 10% for each buff removed.
-

Divine Strike [P]
Attacks an enemy whenever their HP drops below 50%. This attack places a 100% Heal Reduction debuff for 2 turns.
-

Celestial Bond [P]
Adds one Sky Bond buff to Grythion at the start of each turn. Also adds one Sky Bond buff to Grythion whenever an enemy's HP drops below 50%.
Each Sky Bond buff increases Grythion's: ATK by 5%; C. RATE by 3%; C. DMG by 5%; SPD by 2.5.
Will ignore Shield, Block Damage, and Unkillable buffs when Grythion has 10 or more Sky Bond buffs.
Can stack up to 20 Sky Bond buffs. Sky Bond buffs cannot be blocked or removed.
-

Fair Wind [P]
Whenever Grythion’s Turn Meter is decreased, the Turn Meters of all enemies will be decreased by the same amount. Places a Stun debuff for 1 turn on enemies with fully depleted Turn Meters.
Whenever an enemy’s Turn Meter is filled, Grythion’s Turn Meter will be filled the same amount. Occurs once per enemy turn. Turn Meter increases are tracked and counted individually for each enemy.
-

Almighty Strength [P]
Damage from skills that scale based on enemy MAX HP cannot exceed 10% of the Boss' MAX HP when attacking the Boss.
-

Almighty Persistence [P]
All Turn Meter reduction effects are decreased by 50% when used against the Boss.
-

Almighty Immunity [P]
Immune to Stun, Freeze, Sleep, Provoke, Block Active Skills, Block Passive Skills, Fear, True Fear, Petrification, Berserk, Enfeeble, Nullify, Ensnare, Fatigue, and Hunter's Gaze debuffs. Also immune to HP exchange effects, HP balancing effects, and cooldown increasing effects.
Rewards
May drop in a battle
-
 Griffin Feathers
× 5–9
50%
-
 Griffin Feathers
× 7–13
50%
First clear
-
Griffin Feathers
× 20
-
Griffin Feathers
× 15
-
 Epic Skill Tome
Strategy
How It Works
-
Grythion is no easy fight. Many of his abilities combine to be able to counter or deconstruct almost any team, and it may require you to use manual control to achieve victory.
-
Your primary enemy - other than Grythion - is the Sky Bond. In this battle, it’s very easy to end up on a ticking clock, as the Sky Bond offers the Celestial Griffin huge bonuses to SPD and damage.
-
Tracking the boss’ cooldown timers is critical to success. He is incredibly good at manipulating buffs and debuffs to his advantage - either he removes debuffs to fill his turn meter, or he removes your buffs to deal damage - enough damage to kill even very powerful teams, especially when combined with Divine Strike.
-
One major thing to avoid is using any Turn Meter fill and reduction skills. Grythion will reduce all Turn Meter Reduction effects by 50%, but that’s no different from any other Doom Tower boss. No, the issue is that Grythion will mirror all Turn Meter Reduction effects - so, reduce his turn meter by 50%, and he’ll reduce the turn meters of your entire team by 50%. Increase your team’s Turn Meters by 15%, and Grythion will increase his Turn Meter by 75% - 15% for each Champion on your team. The effect can be resisted, however, so if you want to try and use Turn Meter reduction to control Grythion, be sure to pack plenty of RES. Needless to say, leave Champions that increased friendly Turn Meters off your team.
-
You will need strong healing to keep your Champions above 50% HP, as he can destroy a target extremely quickly once they dip below that threshold. You’ll also want good debuff removal to counteract anything Grythion puts out.
-
Ultimately, you’ll need a team that can function without buffs - Champions that destroy HP and ignore DEF will be critical, as you can’t rely on debuffs to make Grythion vulnerable without giving him the opportunity to turn the tables. Same goes for RES - you can’t use buffs to stop everything Grythion dishes out.
1
2
3
4
5
6
7
8
9
11
12
13
14
15
16
17
18
19
21
22
23
24
25
26
27
28
29
31
32
33
34
35
36
37
38
39
41
42
43
44
45
46
47
48
49
51
52
53
54
55
56
57
58
59
61
62
63
64
65
66
67
68
69
71
72
73
74
75
76
77
78
79
81
82
83
84
85
86
87
88
89
91
92
93
94
95
96
97
98
99
101
102
103
104
105
106
107
108
109
111
112
113
114
115
116
117
118
119
Floor 90 · Celestial Griffin
- Silver Keys
- 1
What one battle costs.
Wave 1
-
Lydia the Deathsiren
Lvl. 180
-
Pyxniel
Lvl. 180
-
Belanor
Lvl. 180
-
Belanor
Lvl. 180
-
Lydia the Deathsiren
Lvl. 180
Wave 2
Grythion
Celestial Griffin
Spirit · Lvl. 350
- HP
- 2,802,645
- ATK
- 7,474
- DEF
- 4,484
- SPD
- 250
- C.RATE
- 15%
- C.DMG
- 50%
- RES
- 330
- ACC
- 250
Boss skills
-
Shockwave
Attacks 1 enemy. Has a 100% chance of placing a Fear debuff for 1 turn.
-
Rock Smash Cooldown: 3 turns
Transfers all debuffs from Grythion to each enemy, then attacks all enemies. Fills Grythion’s Turn Meter by 5% for each debuff transferred.
-
Death Gust Cooldown: 3 turns
Removes all buffs from all enemies, then attacks all enemies.
The buff removal cannot be resisted. Damage increases by 10% for each buff removed.
-
Divine Strike [P]
Attacks an enemy whenever their HP drops below 50%. This attack places a 100% Heal Reduction debuff for 2 turns.
-
Celestial Bond [P]
Adds one Sky Bond buff to Grythion at the start of each turn. Also adds one Sky Bond buff to Grythion whenever an enemy's HP drops below 50%.
Each Sky Bond buff increases Grythion's: ATK by 5%; C. RATE by 3%; C. DMG by 5%; SPD by 2.5.
Will ignore Shield, Block Damage, and Unkillable buffs when Grythion has 10 or more Sky Bond buffs.
Can stack up to 20 Sky Bond buffs. Sky Bond buffs cannot be blocked or removed.
-
Fair Wind [P]
Whenever Grythion’s Turn Meter is decreased, the Turn Meters of all enemies will be decreased by the same amount. Places a Stun debuff for 1 turn on enemies with fully depleted Turn Meters.
Whenever an enemy’s Turn Meter is filled, Grythion’s Turn Meter will be filled the same amount. Occurs once per enemy turn. Turn Meter increases are tracked and counted individually for each enemy.
-
Almighty Strength [P]
Damage from skills that scale based on enemy MAX HP cannot exceed 10% of the Boss' MAX HP when attacking the Boss.
-
Almighty Persistence [P]
All Turn Meter reduction effects are decreased by 50% when used against the Boss.
-
Almighty Immunity [P]
Immune to Stun, Freeze, Sleep, Provoke, Block Active Skills, Block Passive Skills, Fear, True Fear, Petrification, Berserk, Enfeeble, Nullify, Ensnare, Fatigue, and Hunter's Gaze debuffs. Also immune to HP exchange effects, HP balancing effects, and cooldown increasing effects.
Rewards
May drop in a battle
-
Griffin Feathers
× 5–10
50%
-
 Griffin Feathers
× 3–5
50%
First clear
-
Griffin Feathers
× 100
-
Griffin Feathers
× 30
-
 Void Shard
Strategy
How It Works
-
Grythion is no easy fight. Many of his abilities combine to be able to counter or deconstruct almost any team, and it may require you to use manual control to achieve victory.
-
Your primary enemy - other than Grythion - is the Sky Bond. In this battle, it’s very easy to end up on a ticking clock, as the Sky Bond offers the Celestial Griffin huge bonuses to SPD and damage.
-
Tracking the boss’ cooldown timers is critical to success. He is incredibly good at manipulating buffs and debuffs to his advantage - either he removes debuffs to fill his turn meter, or he removes your buffs to deal damage - enough damage to kill even very powerful teams, especially when combined with Divine Strike.
-
One major thing to avoid is using any Turn Meter fill and reduction skills. Grythion will reduce all Turn Meter Reduction effects by 50%, but that’s no different from any other Doom Tower boss. No, the issue is that Grythion will mirror all Turn Meter Reduction effects - so, reduce his turn meter by 50%, and he’ll reduce the turn meters of your entire team by 50%. Increase your team’s Turn Meters by 15%, and Grythion will increase his Turn Meter by 75% - 15% for each Champion on your team. The effect can be resisted, however, so if you want to try and use Turn Meter reduction to control Grythion, be sure to pack plenty of RES. Needless to say, leave Champions that increased friendly Turn Meters off your team.
-
You will need strong healing to keep your Champions above 50% HP, as he can destroy a target extremely quickly once they dip below that threshold. You’ll also want good debuff removal to counteract anything Grythion puts out.
-
Ultimately, you’ll need a team that can function without buffs - Champions that destroy HP and ignore DEF will be critical, as you can’t rely on debuffs to make Grythion vulnerable without giving him the opportunity to turn the tables. Same goes for RES - you can’t use buffs to stop everything Grythion dishes out.
Opens at level 40
 1
2
3
4
5
6
7
8
9
 11
12
13
14
15
16
17
18
19
 21
22
23
24
25
26
27
28
29
 31
32
33
34
35
36
37
38
39
 41
42
43
44
45
46
47
48
49
51
52
53
54
55
56
57
58
59
61
62
63
64
65
66
67
68
69
71
72
73
74
75
76
77
78
79
81
82
83
84
85
86
87
88
89
91
92
93
94
95
96
97
98
99
101
102
103
104
105
106
107
108
109
111
112
113
114
115
116
117
118
119
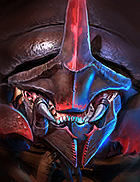
Floor 90 · Dreadhorn
- Silver Keys
- 1
What one battle costs.
Wave 1
-
 Little Miss Annie
Lvl. 130
-
Little Miss Annie
Lvl. 130
-
 Thea the Tomb Angel
Lvl. 130
-
 Bystophus
Lvl. 130
-
Thea the Tomb Angel
Lvl. 130
Wave 2


Bommal
Dreadhorn
 Force · Lvl. 280
- HP
- 1,493,325
- ATK
- 7,964
- DEF
- 7,964
- SPD
- 150
- C.RATE
- 15%
- C.DMG
- 50%
- RES
- 100
- ACC
- 150
Boss skills
-

Ruinous Crush
Attacks all enemies. Decreases Bomb debuff detonation countdowns by 1 turn. Also instantly activates any HP Burn debuffs on each target and decreases the duration of those debuffs by 1 turn.
-

Magma Flood Cooldown: 3 turns
Attacks all enemies. Places a HP Burn debuff on each enemy for 3 turns.
Passive Effect
Enemies receive 100% more damage from HP Burn debuffs for each Bomb debuff they are under.
-
Rain of Bombs Cooldown: 3 turns
Removes all buffs from all enemies, then attacks them. Places a Bomb debuff on each enemy that detonate after 2 turns. Places 1 additional Bomb debuff for each buff removed by this Skill. The Bomb debuffs cannot be blocked or removed.
-

Dread Minions Cooldown: 5 turns
Places a 50% Increase ATK buff on Bommal the Dreadhorn for 5 turns, then summons two Dreadbombs and grants an Extra Turn.
The Increase ATK buff cannot be removed.
Passive Effect
Summons 1 Dreadbomb every time Bommal’s Turn Meter is decreased.
-

Pressure Wave [P]
Each time an enemy places any debuff (except Bomb debuffs) on Bommal, places a Bomb debuff on that enemy that detonates after 2 turns.
These Bomb debuffs cannot be blocked or removed.
Each time a Bomb debuff detonates on an enemy, has a 25% chance of placing a Stun debuff on all other enemies for 1 turn.
Bommal receives 300% more damage from Bomb debuffs.
-

Almighty Immunity [P]
Immune to Stun, Freeze, Sleep, Provoke, Block Active Skills, Block Passive Skills, Fear, True Fear, Petrification, Berserk, Enfeeble, Nullify, Ensnare, Fatigue, and Hunter's Gaze debuffs. Also immune to HP exchange effects, HP balancing effects, and cooldown increasing effects.
-

Almighty Strength [P]
Damage from skills that scale based on enemy MAX HP cannot exceed 10% of the Boss' MAX HP when attacking the Boss.
-

Almighty Persistence [P]
All Turn Meter reduction effects are decreased by 50% when used against the Boss.
Rewards
May drop in a battle
-
 Dreadhorn Plates
× 5–9
50%
-
 Dreadhorn Plates
× 7–13
50%
First clear
-
Dreadhorn Plates
× 20
-
Dreadhorn Plates
× 15
-
Void Shard
Strategy
How It Works
-
Bommal is a powerful Boss with impressive ACC that allows him to shower his enemies with Bombs. These Bombs cannot be removed or blocked, and the only thing that can save your team is high RES. You’re going to want to get your team’s Resistance as high as possible, using whatever means you’ve got available.
-
Aside from all the bombing, Bommal also sets your team on fire, and the HP Burn damage scales up based on the number of Bombs you’ve got on you. If that sounds manageable, keep in mind that he’ll be dropping a lot of Bombs - he throws them out on your whole team every time you place a debuff on him.
-
Now, Bombs are Bommal's weapon of choice, but they’re also the chink in his armor. He also receives massive bonus damage from Bombs.
-
Bommal the Dreadhorn also has his minions – Dreadbombs. They are very slow and may seem like they're not a threat. However, at the start of their turn, they self-destruct, dealing incredible damage to your team. Neither Shields nor DEF will help against it – you can only reduce the damage by placing a Freeze debuff on the Dreadbomb. Alternatively, if you can get it, you can use a Block Damage buff to prevent the blast from even scratching you.
-
Dreadbombs may be slow, but they’re immune to all effects except Freeze and HP Burn, and they don’t receive any damage from enemy attacks. In addition, when they take damage from HP Burn (including a HP Burn debuff on Bommal himself), they fill their Turn Meters.
-
To defeat this Boss you will need:
- high RES
- a Decrease ACC debuff on the Boss at all times
- to place as few debuffs as possible
- Block Damage and Unkillable buffs
- Champions that can consistently Freeze the Dreadbombs
1
2
3
4
5
6
7
8
9
11
12
13
14
15
16
17
18
19
21
22
23
24
25
26
27
28
29
31
32
33
34
35
36
37
38
39
41
42
43
44
45
46
47
48
49
51
52
53
54
55
56
57
58
59
61
62
63
64
65
66
67
68
69
71
72
73
74
75
76
77
78
79
81
82
83
84
85
86
87
88
89
91
92
93
94
95
96
97
98
99
101
102
103
104
105
106
107
108
109
111
112
113
114
115
116
117
118
119
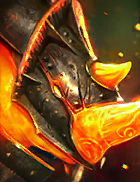
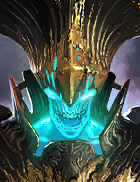
Floor 90 · Dreadhorn
- Silver Keys
- 1
What one battle costs.
Wave 1
-
Little Miss Annie
Lvl. 225
-
Little Miss Annie
Lvl. 225
-
Thea the Tomb Angel
Lvl. 225
-
Bystophus
Lvl. 225
-
Thea the Tomb Angel
Lvl. 225
Wave 2
Bommal
Dreadhorn
Force · Lvl. 350
- HP
- 2,802,645
- ATK
- 14,947
- DEF
- 14,947
- SPD
- 250
- C.RATE
- 15%
- C.DMG
- 50%
- RES
- 330
- ACC
- 750
Boss skills
-
Ruinous Crush
Attacks all enemies. Decreases Bomb debuff detonation countdowns by 1 turn. Also instantly activates any HP Burn debuffs on each target and decreases the duration of those debuffs by 1 turn.
-
Magma Flood Cooldown: 3 turns
Attacks all enemies. Places a HP Burn debuff on each enemy for 3 turns.
Passive Effect
Enemies receive 100% more damage from HP Burn debuffs for each Bomb debuff they are under.
-
Rain of Bombs Cooldown: 3 turns
Removes all buffs from all enemies, then attacks them. Places a Bomb debuff on each enemy that detonate after 2 turns. Places 1 additional Bomb debuff for each buff removed by this Skill. The Bomb debuffs cannot be blocked or removed.
-
Dread Minions Cooldown: 5 turns
Places a 50% Increase ATK buff on Bommal the Dreadhorn for 5 turns, then summons two Dreadbombs and grants an Extra Turn.
The Increase ATK buff cannot be removed.
Passive Effect
Summons 1 Dreadbomb every time Bommal’s Turn Meter is decreased.
-
Pressure Wave [P]
Each time an enemy places any debuff (except Bomb debuffs) on Bommal, places a Bomb debuff on that enemy that detonates after 2 turns.
These Bomb debuffs cannot be blocked or removed.
Each time a Bomb debuff detonates on an enemy, has a 25% chance of placing a Stun debuff on all other enemies for 1 turn.
Bommal receives 300% more damage from Bomb debuffs.
-
Almighty Immunity [P]
Immune to Stun, Freeze, Sleep, Provoke, Block Active Skills, Block Passive Skills, Fear, True Fear, Petrification, Berserk, Enfeeble, Nullify, Ensnare, Fatigue, and Hunter's Gaze debuffs. Also immune to HP exchange effects, HP balancing effects, and cooldown increasing effects.
-
Almighty Strength [P]
Damage from skills that scale based on enemy MAX HP cannot exceed 10% of the Boss' MAX HP when attacking the Boss.
-
Almighty Persistence [P]
All Turn Meter reduction effects are decreased by 50% when used against the Boss.
Rewards
May drop in a battle
-
Dreadhorn Plates
× 5–10
50%
-
 Dreadhorn Plates
× 3–5
50%
First clear
-
Dreadhorn Plates
× 100
-
Dreadhorn Plates
× 30
-
 Sacred Shard
Strategy
How It Works
-
Bommal is a powerful Boss with impressive ACC that allows him to shower his enemies with Bombs. These Bombs cannot be removed or blocked, and the only thing that can save your team is high RES. You’re going to want to get your team’s Resistance as high as possible, using whatever means you’ve got available.
-
Aside from all the bombing, Bommal also sets your team on fire, and the HP Burn damage scales up based on the number of Bombs you’ve got on you. If that sounds manageable, keep in mind that he’ll be dropping a lot of Bombs - he throws them out on your whole team every time you place a debuff on him.
-
Now, Bombs are Bommal's weapon of choice, but they’re also the chink in his armor. He also receives massive bonus damage from Bombs.
-
Bommal the Dreadhorn also has his minions – Dreadbombs. They are very slow and may seem like they're not a threat. However, at the start of their turn, they self-destruct, dealing incredible damage to your team. Neither Shields nor DEF will help against it – you can only reduce the damage by placing a Freeze debuff on the Dreadbomb. Alternatively, if you can get it, you can use a Block Damage buff to prevent the blast from even scratching you.
-
Dreadbombs may be slow, but they’re immune to all effects except Freeze and HP Burn, and they don’t receive any damage from enemy attacks. In addition, when they take damage from HP Burn (including a HP Burn debuff on Bommal himself), they fill their Turn Meters.
-
To defeat this Boss you will need:
- high RES
- a Decrease ACC debuff on the Boss at all times
- to place as few debuffs as possible
- Block Damage and Unkillable buffs
- Champions that can consistently Freeze the Dreadbombs